How to Check a Disk from Windows
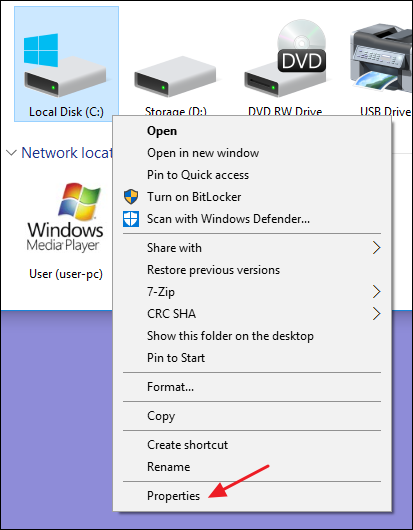
Running the Check Disk tool from the Windows desktop is easy. In File
Explorer, right-click the drive you want to check, and then choose
“Properties.”

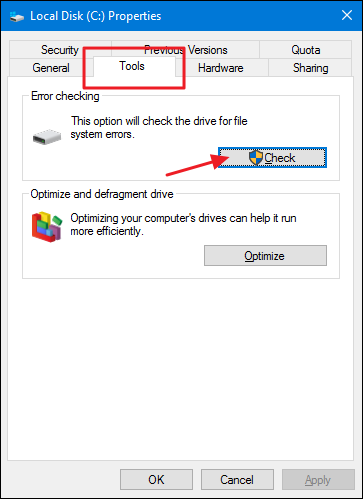
In the properties window, switch to the “Tools” tab and then click the “Check” button. In Windows 7, the button is named “Check now.”

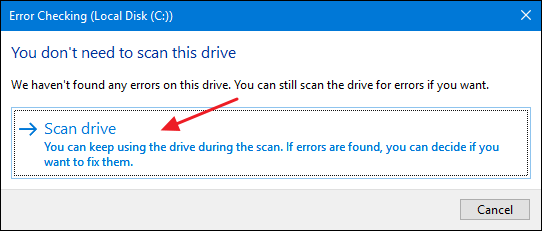
In Windows 8 and 10, Windows may inform you that it hasn’t found any errors on the drive. You can still perform a manual scan by clicking “Scan drive.” This will first perform a scan without attempting any repairs, so it will not restart your PC at this point. If the quick disk scan reveals any problems, Windows will present that option to you. If you want to force it, though, you’ll have to use the command prompt to run chkdsk—something we’ll be covering a bit later in the article.

After Windows scans your drive, if no errors were found, you can just click “Close.”

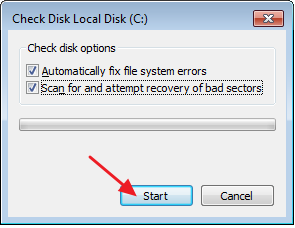
In Windows 7, when you click the “Check now” button, you’ll see a dialog that lets you choose a couple of extra options—namely whether you also want to automatically fix file system errors and scan for bad sectors. If you want to perform the most thorough disk check, go ahead and select both options and then click “Start.” Just be aware that if you add a sector scan to the mix, checking the disk can take quite a while. It may be something you want to do when you don’t need your computer for a few hours.

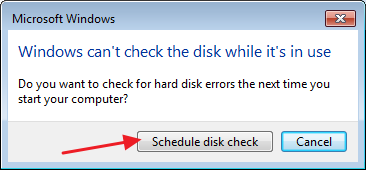
If you elect to fix file system errors or scan for bad sectors, Windows won’t be able to perform a scan while the disk is in use. If that happens, you’ll have the option to cancel the scan or schedule a disk check to happen the next time you restart Windows.

In the properties window, switch to the “Tools” tab and then click the “Check” button. In Windows 7, the button is named “Check now.”
In Windows 8 and 10, Windows may inform you that it hasn’t found any errors on the drive. You can still perform a manual scan by clicking “Scan drive.” This will first perform a scan without attempting any repairs, so it will not restart your PC at this point. If the quick disk scan reveals any problems, Windows will present that option to you. If you want to force it, though, you’ll have to use the command prompt to run chkdsk—something we’ll be covering a bit later in the article.
After Windows scans your drive, if no errors were found, you can just click “Close.”

In Windows 7, when you click the “Check now” button, you’ll see a dialog that lets you choose a couple of extra options—namely whether you also want to automatically fix file system errors and scan for bad sectors. If you want to perform the most thorough disk check, go ahead and select both options and then click “Start.” Just be aware that if you add a sector scan to the mix, checking the disk can take quite a while. It may be something you want to do when you don’t need your computer for a few hours.
If you elect to fix file system errors or scan for bad sectors, Windows won’t be able to perform a scan while the disk is in use. If that happens, you’ll have the option to cancel the scan or schedule a disk check to happen the next time you restart Windows.


Comments
Post a Comment