How to Uninstall Windows Updates using PowerShell on Windows 11
Microsoft periodically releases some updates to solve the original problems, but new problems may appear during the update process, and many technicians choose to delay the update. If your computer encounters problems after updating, then you can choose to uninstall the update. This article will tell you how to use PowerShell to uninstall Windows updates. If you’re interested, keep reading.
You can follow the steps below to uninstall Windows Updates using PowerShell.
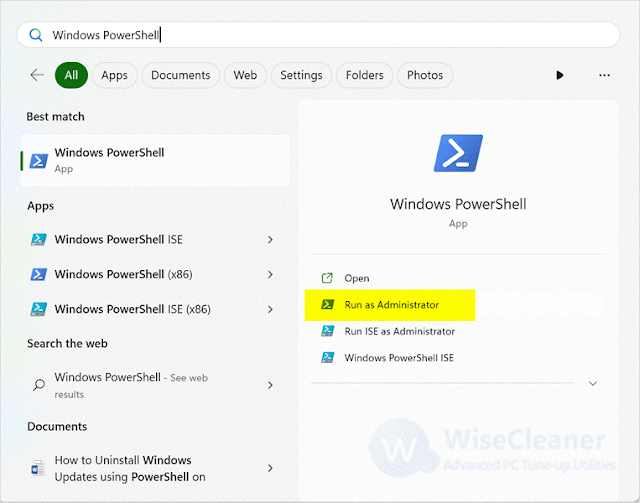
STEP1. OPEN THE WINDOWS POWERSHELL
Click on Windows Start and type Windows PowerShell in the search box. Right-click on the matched item and select Run as administrator.
STEP2. ENTER THE COMMAND TO VIEW INSTALLED UPDATES
After running Windows PowerShell, type the following command in the window and click Enter. You will see all the updates installed on your Windows computer.
wmic qfe list brief /format:tableSTEP3. ENTER THE COMMAND TO UNINSTALL THE UPDATE
Find the update you want to uninstall in the list of all downloaded updates and write down the hotfix ID. Then continue to enter the following command in the window and click Enter.
wusa /uninstall /kb:updateIDNotice: Replace the update ID in the command with the ID of the update that needs to be uninstalled. For example, wusa /uninstall /kb:5025239
After running the above command, a pop-up window will appear “Do you want to uninstall the following Windows software update?” Select Yes to continue uninstalling the update.
The uninstallation will take a few seconds and you may need to restart your computer after the end, you can choose to reboot immediately or later.
If you realize that the error is caused by a Windows update, then the most effective way is to uninstall the problematic update, and the above methods can help you do that easily. If you have other difficulties with computer use, welcome to visit WiseCleaner.


.png)
Comments
Post a Comment